Handbrake is open source video transcoder which supports many video formats.
The main purpose of using a Handbrake is to reduce the size of your video files. Handbrake encodes and reduces the size of video files up to five times (sometimes even more depending on format), so if you have a video file that has a total size of for example 1Gb, Handbrake can transcode it, and convert it into a file with ~ 200Mb in size, without affecting its quality!
Handbrake is supporting all platforms Windows, Linux, Mac OS and it is preinstalled in your seedbox!
So let’s introduce Handbrake’s basic options.

Main menu explained:

“Source” – Here we can load a video
“Start” – Start encoding
“Pause” – Pause encoding
“Enqueue” – Add video files to enqueue
“Queue” – Displays all videos queried into project
“Preview” – Here we can preview our video without saving it first
“Activity” – Usefull option for debugging when encoding a video. Any existing errors will be shown here
How to load a video
First, we need to click on this button named “Source”

After that, a popup window will show us to browse the file we want to get encoded. To confirm the selection, press “OK”.
When a video is loaded, our main window will look like this:

When the video is loaded properly, we can change a few basic settings.
We can change the title of a video, destination folder, desired format, to make a video Web optimized or to change a title.
In “Picture” tab, we can change more advanced settings, like Cropping, Storage Geometry, Display Geometry, Filters.

How to change the size of your video in Handbrake?
After the file is loaded, under the “Picture” tab, we can change width and height in pixels of our video.
Notice that, with the lower resolution of a video our file size, will be less! But, always chose some optimal values, in the case that height and width are the way to low, our content will be hardly viewable.
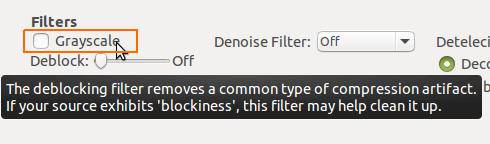
How to convert your video to black & white?
In the “Picture” tab, we have the option to convert our video to black & white as shown in the picture.
How to control video quality?
The size of video file greatly depends on a quality of the video. Luckily for us, Handbrake will optimize our video, so the loss in quality can barely get noticed. In return, we gain a video with rock-solid quality and performance and less in size than the original one!
So let see how we can manage our video.

“Video Encoder” – Here we can specify which encoder our video can use. We can choose between H.264, H.256, MPEG4 & MPEG2 encoder.
An difference in choosing right encoder is described in this Wikipedia article.
“Framerate” – (Source Wikipedia) “Frame rate, also known as frame frequency, is the frequency (rate) at which an imaging device displays consecutive images called frames. The term applies equally to film and video cameras, computer graphics, and motion capture systems. Frame rate is expressed in frames per second (FPS)”.
The higher frame rate we chose, a video will be more smoothly played. Usually, settings of 25 – 30FPS is sufficient for video playback.
“Fast decode” is a useful option to reduce CPU usage while decoding.
How to change encoding quality ?
Using a slider shown on a picture below, we can control encoding quality of our video. If move our slider to the right, it will result in file size that is even bigger than the source file. Moving slider to the left, a video file will be encoded with highest possible quality.
Note that different encoders have different settings.

Customizing Audio settings
We can control our Audio quality in the tab named “Audio Defaults”.

“Encoder” – Here we can select which audio encoder our video file will use.
“Bitrate” – Number of bits per second. Higher values mean higher audio quality
“Mixdown” – Set the mixdown of a track. Most common options are Stereo, Mono, 5.1, Dolby Surround.
“Samplerate” – The more samples taken per second, the more accurate the digital representation of the sound can be.
“Gain” – If our audio is low or high we can use Gain slider to manage a gain of volume.
How to burn subtitles to our video?
The subtitles can be burnt into our video. This method is called hard subtitling. So let’s find out how to do this!
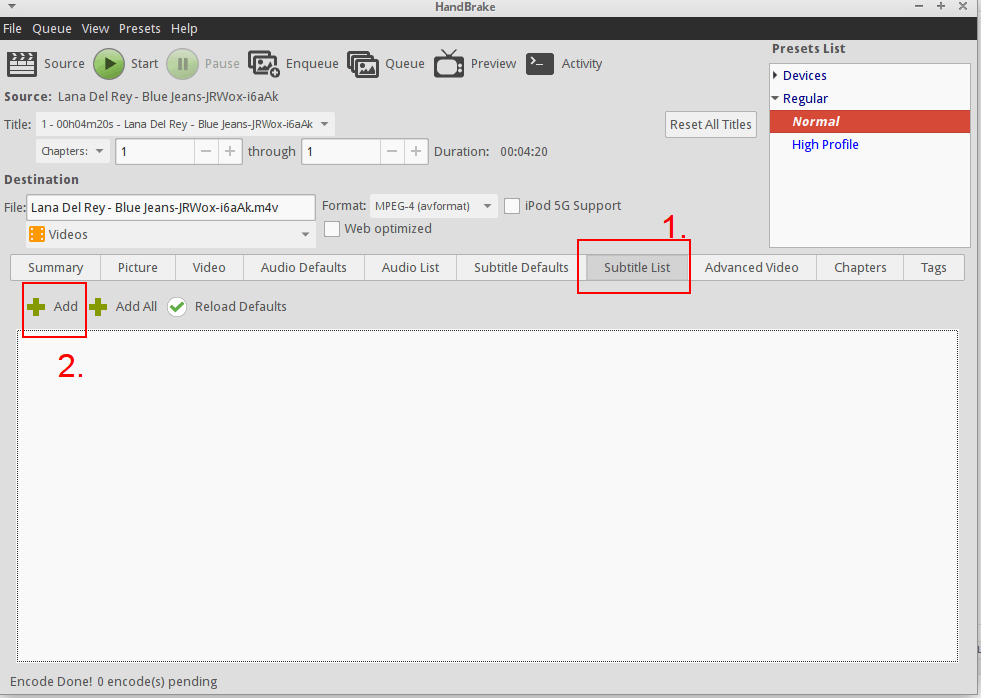
First thing to do, is to make sure that video is loaded. After that select “Subtitle List” tab. After that, choose “Add” button, and a popup window will show up like on picture below:
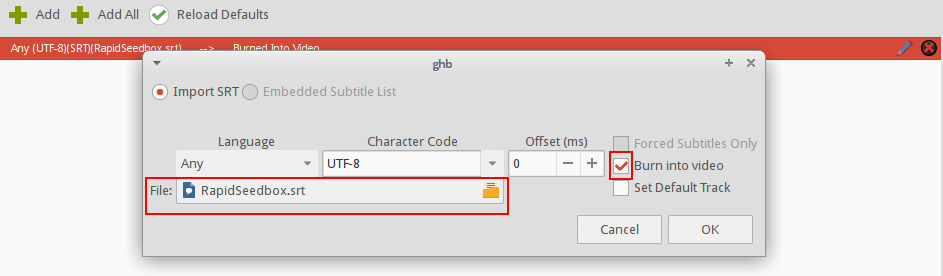
Here we can browse to the destination of our .srt file.
“Offset” slider is for changing an offset of subtitles in milliseconds. If a *.srt file had accurate timing, we can leave this option to 0.
“Burn into video” – This option will hard burn our subtitles into the video, so please be sure it is selected.
After all of those steps press “Start” and Handbrake will start encoding our video with subtitles.
The final product will be shown as on picture below:

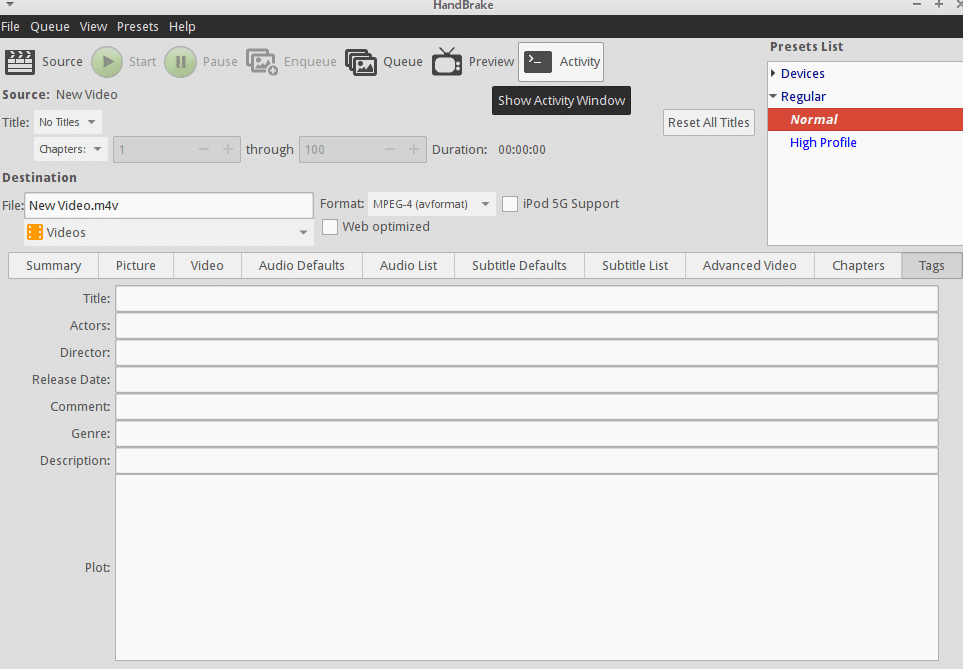
How to manage tags for a video ?
Tagging a video is useful to provide more detailed information about the video. #1 source for providing this kind of information is http://www.imdb.com/
- Was this article helpful ?
- Yes, thanks! Not really