Rclone is a powerful integration tool that can supercharge your cloud storage experience on almost any device, even a seedbox. One of its most essential features is rclone mount, which allows you to localize your cloud storage options.
This article will explore using rclone mount alongside its essential commands and options. We’ll also delve into performance optimization, security considerations, and more to help you get the most out of cloud storage localization.

Table of Contents
- What is rClone Mount?
- rclone Mount Commands and Options
- Security Considerations
- Automating and Managing rclone Mount
- Final Thoughts
1. What is rClone Mount?
rclone mount is a powerful feature of rclone, a command-line tool that helps you manage multiple cloud storage services.
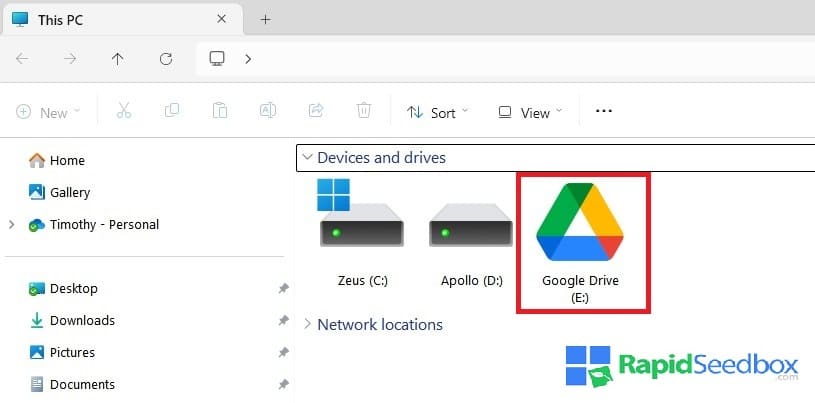
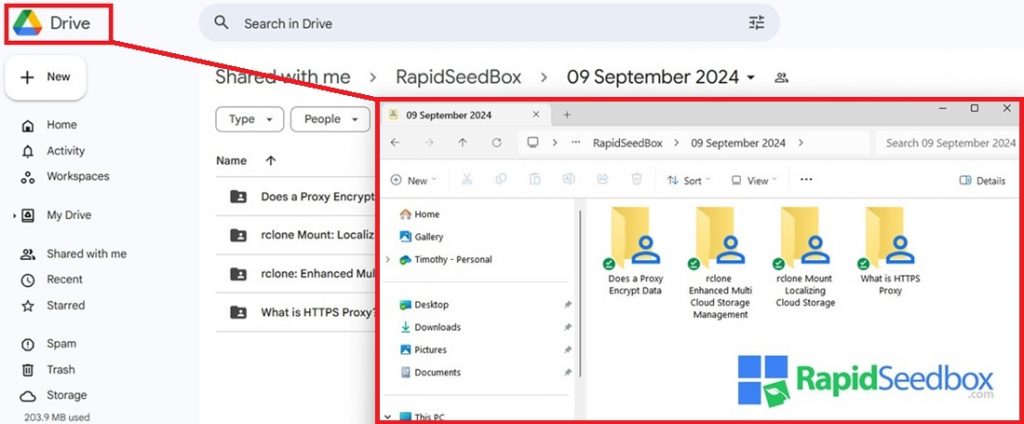
The mount command lets you connect your cloud storage directly to your local file system, making it behave like a physical drive on your computer. This means you can browse, open, edit, and save files stored in the cloud just as you would with files stored locally.
a. How rClone Mount Works
At its core, rclone mount utilizes the Filesystem in Userspace (FUSE) interface. This enables users to create custom file systems without modifying kernel code.
When you mount a cloud storage service with rclone, it creates a virtual drive on your system that mirrors the content of your remote cloud storage. This enables seamless integration, providing a native experience when accessing cloud files.
b. Advantages of Mounting Cloud Drives Locally
Mounting cloud drives locally through rclone mount offers several significant benefits that enhance your interaction with your cloud storage. Here are some key advantages:
- Seamless Access and Management: Eliminates the need to use web interfaces or separate applications.
- Improved Workflow Efficiency: Integrate cloud storage into your daily tasks, allowing you to manage files efficiently.
- Cross-Platform Compatibility: rclone mount works across multiple operating systems, including Linux, macOS, and Windows (or even a seedbox).
- Centralized Data Management: Manage multiple cloud storage accounts from different providers in one place.
- Enhanced Security Options: Leverage rclone’s encryption features to ensure your data is secure in transit and at rest.
- Scalability and Flexibility: Easily scale your storage capacity by adding more cloud storage without needing additional physical drives.
2. rclone Mount Commands and Options
Understanding the essential commands and options available with rclone mount is vital for efficiently managing and optimizing your cloud storage.
In the following section, we will walk you through the basic and advanced commands necessary to mount cloud drives and how to fine-tune their performance to suit your needs.
a. Basic rclone Mount Command
The fundamental command to mount a cloud storage service to your local file system is the rclone mount command. The syntax is straightforward:
|
1 |
rclone mount remote_name:path/to/files /path/to/local/mount |
- remote_name: The name of the remote you configured (e.g., mydrive for Google Drive).
- path/to/files: The path within the cloud storage you want to mount. If you’re going to mount the entire cloud drive, you can leave this as just remote_name:.
- /path/to/local/mount: The local directory where you want to mount the cloud storage.
Example:
|
1 |
rclone mount mydrive: ~/MyCloudDrive |
In this example, you mount the Google Drive remote (mydrive) to the ~/MyCloudDrive directory on your local file system.
b. Useful rclone Mount Options
rclone provides various options to customize the behavior and performance of the mount. Here are some of the most commonly used options:
–vfs-cache-mode: You can effectively manage how files are read from and written to cloud storage by adjusting the Virtual File System (VFS) caching settings.
- off: No caching (default). Best for small files or when changes are infrequent.
- minimal: Cache only for reading ahead and file writing.
- writes: Cache writes; useful when writing larger files.
- full: Cache reads and writes; provides the best performance but uses more disk space.
Example:
|
1 |
rclone mount mydrive: ~/MyCloudDrive --vfs-cache-mode writes |
–allow-other: This option allows other users on the system to access the mounted drive. It is useful in a multi-user environment but should be used cautiously to avoid unauthorized access.
Example:
|
1 |
rclone mount mydrive: ~/MyCloudDrive --allow-other |
–buffer-size: Specifies the size of the in-memory buffer for each file being transferred. Increasing the buffer size can improve performance, especially for large files.
Example:
|
1 |
rclone mount mydrive: ~/MyCloudDrive --buffer-size 64M |
–dir-cache-time: This determines how long to cache the directory structure. Increasing this value can reduce the number of API calls made to the cloud provider, improving performance.
Example:
|
1 |
rclone mount mydrive: ~/MyCloudDrive --dir-cache-time 1h |
–read-only: Mounts the remote as read-only, which is helpful for scenarios where you only need to access files without modifying them.
Example:
|
1 |
rclone mount mydrive: ~/MyCloudDrive --read-only |
–vfs-read-chunk-size: Adjusts the size of chunks read from the cloud storage. Increasing this can improve performance when streaming media or reading large files.
Example:
|
1 |
rclone mount mydrive: ~/MyCloudDrive --vfs-read-chunk-size 32M |
c. Examples of Common Use Cases
Mounting a Cloud Drive for Media Streaming:
|
1 |
rclone mount mydrive: ~/MyCloudDrive --vfs-cache-mode full --buffer-size 128M --vfs-read-chunk-size 32M |
for Document Access:
|
1 |
rclone mount mydrive: ~/MyCloudDrive --vfs-cache-mode minimal --dir-cache-time 12h |
Read-Only Backup:
|
1 |
rclone mount mydrive:backup ~/BackupDrive --read-only |
d. Unmounting rclone Safely
After you finish using the mounted drive, you must unmount it properly to ensure all operations are completed, and no data is lost. On Ubuntu, you can unmount it using the fusermount command:
|
1 |
fusermount -u ~/MyCloudDrive |
This command will safely unmount the directory, ensuring ongoing operations are finalized correctly.
Want to Automate Your Cloud Workflows?
Leverage the automation capabilities of rclone with the unbeatable speed of RapidSeedbox. RapidSeedbox provides the infrastructure for high-speed data transfers and enables you to automate complex workflows.
Get started with RapidSeedbox now!
3. Security Considerations
When using rclone mount to access and manage cloud storage, it’s crucial to implement security measures to protect your data. This is especially important because cloud storage often contains sensitive information, and therefore, ensuring it is securely accessed and managed is paramount.
a. Securing Data in Transit
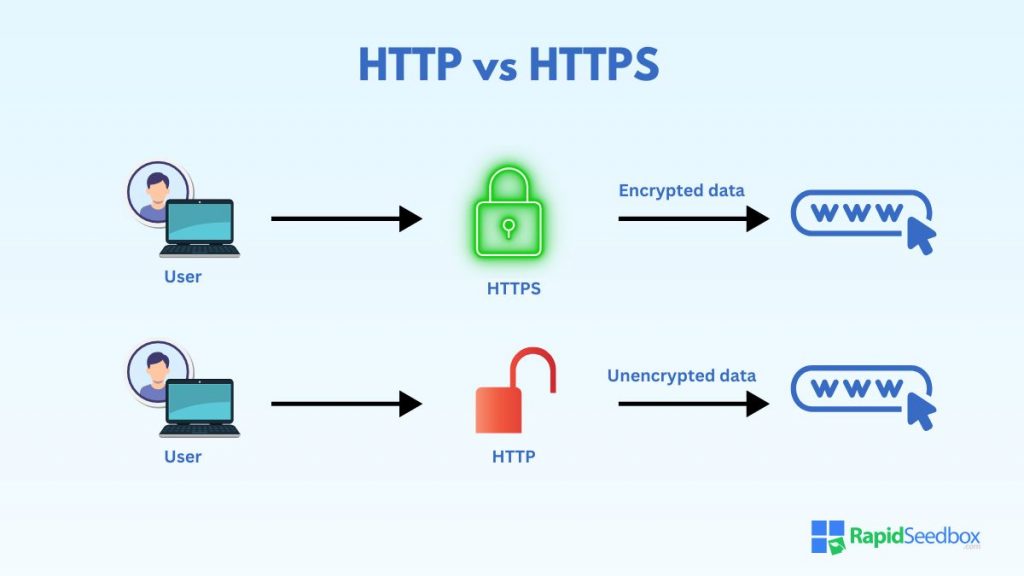
One of the most critical security aspects is ensuring that data transferred between your local system and the cloud storage provider is encrypted. rclone uses HTTPS by default, thus encrypting data in transit to protect it from being intercepted by malicious actors.
rclone automatically uses SSL/TLS to encrypt all data transferred over the network when communicating with cloud storage providers. This means that, by default, your data is protected against eavesdropping.
Example:
|
1 |
rclone mount mydrive: ~/MyCloudDrive |
In this basic command, all data transferred between mydrive and your local mount point is encrypted using HTTPS.
b. Using Encrypted Remotes
For added security, particularly when storing sensitive data, you can use rclone’s built-in encryption feature to encrypt your data before it is uploaded to the cloud storage provider.
This ensures that even if the cloud storage is compromised, your data remains unreadable without the encryption keys.
Setting Up an Encrypted Remote:
First, configure a new encrypted remote:
|
1 |
rclone config |
Once you’ve selected your cloud storage provider, choose the “Encrypt/Decrypt a remote” option to configure encryption.
You will then be prompted to enter a password and, optionally, a salt. These credentials are used to encrypt and decrypt your files.
Example Configuration:
- Name: encrypteddrive
- Remote to encrypt: mydrive:
- Password: Create a strong password.
Mounting the Encrypted Remote:
You can mount the encrypted remote just like any other remote storage once it is configured:
|
1 |
rclone mount encrypteddrive: ~/MyEncryptedDrive |
With this setup, all files stored on encrypteddrive are encrypted before being uploaded, and they are decrypted on the fly when accessed locally.
c. Managing Access Controls
rclone provides options to control who can access the mounted cloud storage to enhance security, especially in multi-user environments. This is important to prevent unauthorized access to sensitive data.
Restricting Access with –allow-other:
By default, only the user who mounted the remote can access it. However, if you need to allow other users on the same system to access the mounted drive, you can use the –allow-other option. Be cautious with this option, as it can expose your cloud storage to unintended users.
Example:
|
1 |
rclone mount mydrive: ~/MyCloudDrive --allow-other |
Using –uid and –gid for Fine-Grained Control:
You can specify the user ID (–uid) and group ID (–gid) that should own the files in the mounted drive. This helps enforce permissions and restrict access to specific users or groups.
Example:
|
1 |
rclone mount mydrive: ~/MyCloudDrive --uid 1001 --gid 1001 |
Mounting as Read-Only:
Mounting the drive as read-only can prevent data modifications, making it an ideal option for safeguarding backups or other critical information.
Example:
|
1 |
rclone mount mydrive: ~/MyCloudDrive --read-only |
d. Protecting Credentials and Configurations
Your rclone configuration file (~/.config/rclone/rclone.conf) contains sensitive information, such as API keys and passwords. It is essential to protect this file to prevent unauthorized access to your cloud storage accounts.
Restricting Access to the Configuration File:
Set the appropriate permissions on the rclone configuration file to ensure that only your user account can access it.
Example:
|
1 |
chmod 600 ~/.config/rclone/rclone.conf |
This command ensures that only the file owner has read and write permissions, protecting the file from other system users.
Storing Secrets Securely:
Avoid storing passwords or other sensitive information directly in scripts or configuration files. Instead, use environment variables or rclone’s built-in support to prompt passwords.
Example:
|
1 |
rclone mount mydrive: ~/MyCloudDrive --password-command "gpg --decrypt ~/secrets/password.gpg" |
In this example, the password is securely stored in an encrypted file and decrypted on the fly when needed.
4. Automating and Managing rclone Mount
This section covers how to automate the mounting process, handle multiple mounts, and manage mounted drives effectively on Ubuntu.
a. Automating rclone Mount on System Startup
Automating the rclone mount process so that your cloud storage is available immediately after your system starts can save time and ensure consistent access. You can achieve this using systemd, a system and service manager widely used on Linux.
Creating a systemd Service File:
You can create a custom service file to automate the mounting process. First, create a new systemd service file:
|
1 |
sudo nano /etc/systemd/system/rclone-mount.service |
Add the following content to the service file, adjusting the paths and options according to your setup:
|
1 2 3 4 5 6 7 8 9 10 11 12 13 14 15 16 17 18 |
[Unit] Description=Rclone Mount Service After=network-online.target [Service] Type=simple ExecStart=/usr/bin/rclone mount remote_name:path/to/files /path/to/local/mount \ --vfs-cache-mode writes \ --dir-cache-time 1h \ --allow-other \ --uid 1000 \ --gid 1000 ExecStop=/bin/fusermount -u /path/to/local/mount Restart=always User=your_username [Install] WantedBy=multi-user.target |
Replace the following placeholders:
- remote_name:path/to/files with your rclone remote and path.
- /path/to/local/mount with your local mount point.
- your_username with your username.
Save and close the file (in nano, press CTRL + X, then Y, and Enter).
Enabling and Starting the Service:
|
1 2 |
sudo systemctl enable rclone-mount sudo systemctl start rclone-mount |
b. Handling Multiple rclone Mounts
If you need to manage multiple cloud storage accounts or mount different directories from the same cloud service, you can create additional systemd service files or automate them using scripts.
Using Multiple systemd Service Files:
For each additional mount, create a new service file (e.g., rclone-mount-2.service) with the specific configuration for that mount. Repeat the steps from the previous section for each new service file.
Automating with a Script:
Alternatively, you can create a script that mounts all your desired drives and run this script at startup.
Create the script:
|
1 |
nano ~/mount_all_clouds.sh |
You can then add the following content to the script:
|
1 2 3 |
#!/bin/bash rclone mount remote1:path/to/files1 ~/MountPoint1 --vfs-cache-mode writes --allow-other & rclone mount remote2:path/to/files2 ~/MountPoint2 --vfs-cache-mode full --allow-other & |
Make the script executable:
|
1 |
chmod +x ~/mount_all_clouds.sh |
To run the script at startup, add it to your .bashrc file or create a systemd service.
c. Unmounting rclone Drives Safely
To avoid data corruption or incomplete transfers, it’s essential to unmount rclone drives properly.
Unmounting with systemd:
If you use systemd services to manage your mounts, the drives automatically unmount when you stop the service.
Stop the service to unmount:
|
1 |
sudo systemctl stop rclone-mount |
Manual Unmounting:
|
1 |
fusermount -u ~/MyCloudDrive |
5. Final Thoughts
Rclone mount revolutionizes cloud storage interaction by giving you the power to seamlessly use multiple cloud storage services and, more importantly, access everything as if it were local storage.
You can customize your setup, secure your data, and automate repetitive tasks, gaining a comprehensive solution for efficiently managing cloud storage.
Want to Simplify Your Cloud Storage Management?
With RapidSeedbox, you can easily automate backups, sync files, and migrate data between cloud providers. The robust infrastructure of RapidSeedbox ensures that your operations always run smoothly.


0Comments